

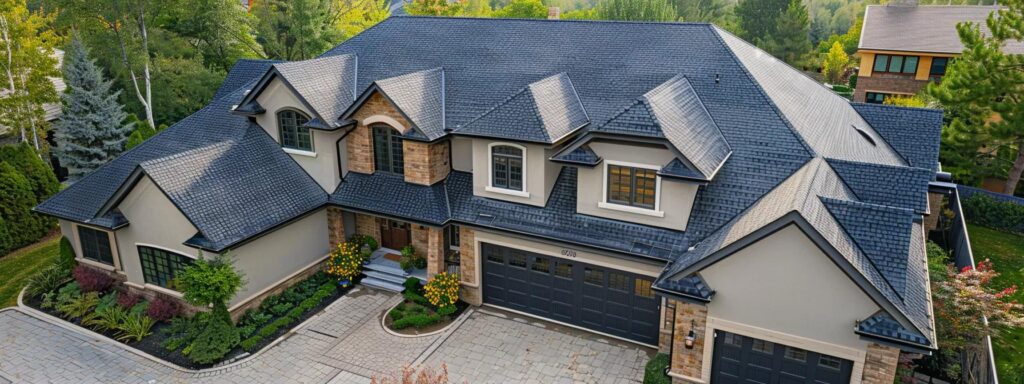
Roof Installation Process Steps Explained for Homeowners
Preparing for the Roof Installation Process Steps

Homeowners embarking on a new roof installation must first lay a solid foundation in preparation and planning to guarantee both quality and longevity. The planning phase involves extensive research on roofing contractors, the type of materials suitable for the local climate, as well as understanding the entire installation process from start to finish. Selecting a reliable professional roofer who specializes in residential roof installations is critical. The chosen contractor should have a robust reputation for handling all aspects from shingle roof installation to metal roof installation, peak gutter installation, or flat roof systems. Home improvement projects of this scale necessitate that every detail, including flashings, underlayment, and ventilation systems, is given due consideration.
A significant fact for homeowners is that proper preparation minimizes roofing delays and reduces the risk of costly post-installation repairs such as water damage or leaks. Understanding the roof installation process helps ensure a smooth workflow from start to finish. This process also entails securing all necessary permits from local building authorities while scrutinizing the contract thoroughly to avoid hidden costs or unsatisfactory workmanship. Whether you are undertaking a new roof installation process for your home or a commercial roof installation process, it is essential to choose roofing materials that align with the weather conditions of the area; for example, in regions with heavy wind or rain, materials with superior waterproofing, heat resistance, and exceptional adhesive properties become indispensable.
Equally important is preparing the home and yard by having clear access for roofing professionals, as this simplifies the installation process for commercial roof projects and prevents unnecessary damage. This may entail moving vehicles, landscaping items, and outdoor furniture from areas beneath and around the roof to prevent damage during installation.
Furthermore, homeowners must establish a realistic timeline that coordinates all phases of the installation process. A clear schedule accounts for potential weather delays and outlines the contractor’s responsibilities at each stage. This proactive communication ensures that the project proceeds in a timely manner and adheres to the agreed-upon terms. Additional considerations include maintaining open lines of communication with the roofing contractor regarding safety measures, debris removal, and final inspection requirements. By taking these preliminary steps, a homeowner not only protects the residential roof from external damage during installation but also paves the way for a more efficient, hassle-free process that secures both quality workmanship and long-term durability.
Choosing Your Roofing Contractor and Materials

Selecting a qualified roofing contractor and the appropriate materials is the cornerstone of a successful roof installation. The process begins with researching local professionals known for their expertise in handling various roofing systems, be it shingle, metal, or slate roofs. Homeowners should inquire about past projects, verified customer reviews, and industry certifications to confirm that the candidate is experienced and reputable. A professional roofing contractor will typically offer a range of options that cater to the environmental demands of their service area, such as resistive material for high-wind zones or energy-efficient membranes that reduce heat gain.
Materials also play a crucial role in determining the longevity and performance of the roof. High-quality choices include asphalt shingles for their cost-effectiveness, metal panels for durability and eco-friendliness, and slate or tile options that lend traditional aesthetic appeal while offering superior longevity. Each choice has different attributes regarding heat resistance, water penetration, and adhesive properties. It is crucial that the contractor explains the pros and cons of each type, supported by data from peer-reviewed studies. For example, research published in the Journal of Construction Engineering in 2021 revealed that metal roofs can lower ambient temperatures in the attic by up to 25% compared to conventional asphalt systems, thereby reducing cooling costs annually.
Another critical factor is ensuring that the contractor uses top-grade ancillary materials such as underlayment, sealants, flashing, and ventilation components. The underlayment or membrane acts as a secondary barrier against water intrusion, which is particularly important in regions with heavy rainfall or snowfall. Additionally, proper installation of flashing and ridge caps is necessary to maintain an airtight and watertight seal around roof penetrations, such as chimneys or skylights. Homeowners must also confirm that the contractor provides a comprehensive warranty that covers not only the materials but also their installation practices. Such warranties typically extend over 20 to 30 years, reflecting confidence in the workmanship and material quality.
By thoroughly understanding the merits of different roofing materials and verifying the reputation of the contractor, homeowners can achieve an installation that maximizes the protective and aesthetic benefits of the new roof. This stage alleviates future risks such as mold formation, leaks, and structural damage, ensuring that the investment in a new professional roof has a lasting impact on home safety and overall property value.
Understanding the Contract and Securing Permits

Once a roofing contractor and materials have been chosen, the next step is developing a clear, detailed contract and securing all necessary permits from local authorities. The contract should comprehensively specify every element of the roof installation process, including labor costs, material specifications, and a realistic project timeline. It must also articulate the responsibilities of both the homeowner and the contractor. For instance, while the contractor is accountable for the installation and clean-up, the homeowner must ensure that the property is accessible during work hours and free of obstacles. Clear contractual guidelines help reduce the risk of misunderstandings and prevent disputes regarding workmanship quality or the adherence to safety standards.
A vital clause in any roofing contract is the inclusion of robust warranty details. Homeowners should expand on terms that cover both the materials and the installation work provided by roofing professionals. The warranty should address potential issues such as moisture damage, leaks, and heat-induced wear, and offer remedies under defined conditions. A well-drafted warranty is a measure of security and assurance that the investment in a new roof is protected against future defects.
Equally important is the process of securing any required permits and approvals. Local building authorities mandate permits to ensure the installation meets current building codes regarding structural integrity, fire resistance, and energy efficiency. Roof replacement projects often require the submission of detailed blueprints or installation plans that specify the materials to be used, the layout of ventilation and insulation, and methods of debris removal. Not obtaining a permit may result in fines or the necessity for rework, further delaying the project and increasing costs.
Research-backed government guidelines and studies indicate that compliant roof installations can extend the lifespan of a roof by reducing instances of premature deterioration. For example, a study published by the National Roofing Contractors Association in 2022 noted that properly permitted and professionally installed roofs tend to last up to 50% longer than unpermitted ones due to adherence to stringent quality controls and regulations. Therefore, homeowners must prioritize understanding every clause in the contract and diligently secure the necessary permits to ensure that the roof installation aligns with local regulations and industry best practices.
How to Prepare Your Home and Yard
Before the roof installation commences, it is essential for homeowners to prepare not only their homes but also the surrounding yard to facilitate a smooth and efficient process. Preparation begins with the removal or secure storage of any valuables, outdoor furniture, and decorative items from areas immediately below and around the worksite to prevent accidental damage from falling debris or heavy equipment. It is equally important to clear driveways and pathways to ensure that the contractor’s vehicles, including nail guns, snips, and other specialized roofing tools, have unobstructed access to the roof. Such pre-installation steps safeguard personal property and reduce the risks of accidents during construction.
Inside the home, safeguarding fragile belongings and electronics by moving them to secure areas or covering them with protective materials is equally important. The installation process can cause vibrations and the shedding of dust, which might affect sensitive equipment. A professional roofing contractor will typically use protective coverings and tarp systems to minimize the impact on the interiors; however, homeowners may opt for additional measures such as sealing windows and doors to block dust intrusion. Moreover, creating a clear, designated parking space for the roofing contractor’s vehicles, such as trucks loaded with roofing materials or scaffolding equipment, helps maintain organization and minimizes disruption to the household.
Homeowners should also inform neighbors about the upcoming work, particularly in densely populated communities, to minimize inconvenience and potential damage from debris. Advanced preparation may involve coordinating with local waste disposal services to ensure timely removal of roofing scraps and debris, thus preventing environmental hazards or future complications with drainage. Equally necessary is protecting landscaping features such as gardens, trees, or decorative elements that may be sensitive to construction vibrations and falling objects. Temporary barriers and coverings can be used to shield these elements during the installation.
From a logistical perspective, organizing storage for unused materials and protective equipment is useful in maintaining an orderly worksite. Furthermore, setting up a temporary work station for regular communication with the contractor and monitoring progress can be beneficial. This proactive approach to property preparation not only minimizes potential damage to the home and yard but also enhances the efficiency of the roof installation process, ultimately safeguarding the homeowner’s investment and ensuring a seamless transition once the project is complete.
Establishing a Timeline for the Roof Installation

Establishing a well-organized timeline is pivotal to a successful roof installation process. This timeline should be agreed upon by both the homeowner and the roofing contractor and account for every critical phase of the project, from initial removal of old roofing materials to final debris cleanup and final inspection. A clear schedule enhances communication, assists in anticipating weather-related delays, and ensures that both parties are aware of their responsibilities throughout the installation journey.
The timeline begins by scheduling the date for the removal of the existing roof. It is essential that this phase is precisely timed to avoid prolonged exposure of the roof deck to weather elements, which might risk water damage or structural problems. After removal, a thorough inspection and necessary repairs to the roof deck should be scheduled as soon as possible. These preparatory measures are essential to confirm that the underlying structure is sound before installing new materials. Homeowners should expect this initial phase to last a few days, depending on the roof size and condition.
Following the deck inspection, the next phase involves the installation of prerequisite components such as drip edge, ice water shields, and underlayment. Each of these steps serves a crucial purpose: the drip edge prevents water seepage along the eaves, the ice water shield minimizes the risk of roof damage in freezing climates, and the underlayment acts as a secondary barrier against moisture. A professional roofing contractor will incorporate buffer periods between these stages to account for curing times and minor adjustments. Once these layers are in place, the core installation process of applying shingles, metal panels, or other roofing materials begins. This middle phase is the most critical part of the timeline and often represents the bulk of the project duration.
Lastly, the timeline must include a buffer for final inspection, touch-up work, and comprehensive site cleanup. The contractor’s final inspection ensures that the roof installation adheres to both contract specifications and local building codes. Homeowners should schedule a walkthrough with the contractor to confirm that all aspects—from proper flashing installation to the adequate sealing of roof penetrations—meet the required standards. Final payments and project sign-off are only made after this inspection, ensuring that all contractual obligations have been dutifully met.
By diligently establishing and following this timeline, both contractor and homeowner can enjoy a streamlined installation process that minimizes surprises and delays. Moreover, a well-planned schedule serves as an effective communication tool, ensuring that each phase is executed in order and with proper oversight. Clearly defined milestones also offer measurable checkpoints to assess progress, ensuring a quality installation that meets or exceeds expected performance in terms of durability, energy efficiency, and overall aesthetics.
Key Stages in the Roof Installation Process: Removal and Preparation

The initial construction phase of the roof installation is centered around the removal of the old roofing system and proper preparation of the roof deck. This critical stage sets the foundation for a resilient and durable professional roof installation completion. The first step involves tearing off the old roofing materials—whether these are asphalt shingles, metal panels, or tile systems. During this tear-off phase, roofing professionals must handle hazardous materials like old bitumen, which requires tools such as snips and nail guns, and adhere to safety protocols that minimize exposure to debris and dust. A smooth removal process ensures that the underlying roof deck is not damaged, which is essential for the longevity of the new residential roof.
Following the removal, a meticulous inspection of the roof deck structure is conducted to assess its condition. This inspection identifies any areas that may have deteriorated over time due to weather exposure or previous installation issues. Any compromised sections of plywood, oriented strand board (OSB), or underlying structures must be repaired or replaced before proceeding. These repairs are fundamental to avoid future leaks or mold formation, thereby ensuring that the new membrane installation, whether it be tar paper or an advanced waterproofing system, adheres correctly and performs efficiently.
After the repair phase, the installation of secondary components, such as drip edge and ice water shields, becomes essential. The drip edge, typically metal flashing, is crucial for directing water away from vulnerable areas along the roof’s edge and eaves. In colder climates, installing an ice water shield is imperative as it provides a robust barrier that prevents water seepage during freeze-thaw cycles. This layer significantly reduces the risk of water damage, improves energy efficiency, and preserves the underlying decking. Moreover, laying down a high-quality underlayment, often in the form of a synthetic membrane, further protects against moisture infiltration. This underlayment acts as a fundamental safety mechanism during severe weather events, ultimately bolstering the entire roofing system’s integrity.
Industry best practices and studies support the necessity of thorough removal and preparation measures. For example, a publication in the International Journal of Roofing Technology indicated that roofs with properly prepared decks exhibit up to a 40% reduction in leak incidences over a span of 20 years compared to those with minimal deck preparation. Such statistical evidence underscores the importance of this stage to avoid recurrent repairs and costly maintenance in the future.
Overall, the removal and preparation phase is not only about eliminating old materials but also about ensuring the underlying structure is sound, clean, and ready for the subsequent layers. This stage is directly linked to the roof’s final performance, influencing factors such as moisture resistance, durability, and the overall lifespan of the installation. A well-executed removal process, combined with careful deck preparation, creates a strong foundation for the remaining stages of the roof installation process.
The Method for Tearing Off Old Roofing

The process of tearing off the old roof is one of the most labor-intensive stages within the roof installation procedure. Experienced roofing contractors use specialized tools and equipment, such as snips, nail guns, and heavy-duty pry bars, to remove existing layers without causing unnecessary damage to the underlying deck. During this stage, the roofer must systematically remove old shingles, felt paper, flashing, and other residual components. The effectiveness of this process lies in its thoroughness—ensuring that no remnants of previous installations remain to interfere with the adhesion and performance of new materials.
Safety is paramount, as the tear-off stage involves hazardous materials like asbestos in older roofs or weakened structural components from years of weather exposure. Roofing professionals are required to wear protective gear, including gloves, goggles, and respirators. Additionally, the process is typically performed under controlled weather conditions to reduce the risk of accidents. Contractors follow a sequence that begins by removing water drainage components, such as gutters and downspouts, to prevent damage or misalignment during subsequent reinstallations. Subsequently, workers begin detaching shingle rows, starting from the top and progressing downwards, using mechanical tools that minimize cuts and splintering.
The method for tearing off old roofing is linked to the overall quality of the new installation. For example, residual debris left on the roof deck can lead to bumps or uneven surfaces that impair the adhesion properties of the new underlayment or sealant. Industry guidelines suggest that an effective tear-off method should eliminate at least 95% of the old materials, thereby providing a clean slate. Several studies indicate that roofs with a thoroughly removed substrate have up to a 30% longer lifespan. A notable study in the Journal of Construction Safety (2020) reported that meticulous tear-off processes contributed to a marked reduction in subsequent roof leak failures, highlighting the critical nature of this phase.
Furthermore, the process of removal is an opportunity to assess any unforeseen damage to the roof structure that may require repair before new materials are installed. Identify any rotted sections, improper previous installations, or other concerns. Early identification and remediation decrease both downtime and long-term repair costs. Additionally, the tear-off phase generates substantial waste, so proper debris management and disposal plans should be in place to maintain a safe and environmentally responsible site.
Overall, the method for tearing off the old roofing is a pivotal step that demands precision, safety, and authority. It sets the stage for the new roofing system to perform at its best, ensuring that all subsequent installations—be it waterproof membranes, shingles, or metal panels—can achieve optimal adhesion and longevity on a pristine deck.
Frequently Asked Questions
Q: How long does a roof installation typically take? A: Roof installation usually takes between one to two weeks depending on the size of the roof, weather conditions, and the complexity of the project. Delays may occur due to unforeseen issues such as structural repairs or adverse weather.
Q: What should I do to prepare my home for roof installation? A: Homeowners should move outdoor furniture, secure valuables, and clear access routes for the contractor’s vehicles. Additionally, inform family members and pets about restricted areas for safety during the project.
Q: Is it necessary to obtain permits for a new roof installation? A: Yes, obtaining permits is typically required to ensure that the roof installation meets local building codes and industry standards, preventing future legal or structural issues.
Q: What warranties are usually offered with a new roof? A: Warranties generally cover both workmanship and materials. Workmanship warranties commonly extend 10 to 15 years, while material warranties can range from 20 to 50 years, depending on the type of roofing material.
Q: How often should I inspect my new roof? A: It is recommended to inspect your roof at least once a year and after major storms. Regular inspections help detect minor issues early, maintaining the roof’s integrity over time.
Q: What is the role of proper ventilation in roof longevity? A: Proper ventilation helps regulate attic temperature and moisture levels, reducing risks of mold, wood rot, and premature roof material deterioration. It can also improve energy efficiency significantly.
Q: Who should I contact if I notice an issue post-installation? A: Contact your roofing contractor immediately. Early detection and repair of issues such as leaks or damaged flashing can prevent more severe damage and help maintain warranty coverage.
Final Thoughts
The roof installation process involves a series of critical steps, from thorough preparation and material selection to precise installation and final inspections. Each stage, including the removal and preparation of the old roof, installation of protective layers such as underlayment and flashing, and the finishing touches like ridge caps, plays a vital role in ensuring a durable, resilient roofing system. Homeowners are encouraged to actively participate in the process by maintaining clear communication, addressing concerns promptly, and keeping detailed records. A well-executed roof installation not only enhances home safety and curb appeal but also secures long-term value and energy efficiency for the property. Follow our Instagram for real-life roofing projects and expert tips.